 |
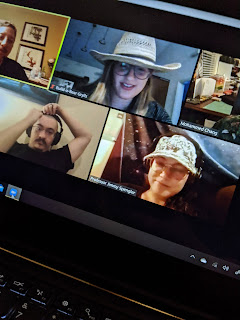
| On Thursday a group of friends gets together on discord to play RPG games - this Thursday's was Dadlands - which I highly recommend if you are into tabletop RPGs. |
 |
| While I was online, THIS was happening in our backyard. |
We have gone back and forth about how to most economically build
my dream barn an actual barn and not a shed for the horses. A local carport company was offering a pretty big Corona sale and they offered "Carolina Barn" styled structures - which is just a raised center aisle barn of various finishes. Even better I got a 12' wide center aisle for the same price as the 10' wide!!! Originally they were not supposed to be ready to build until June, but with people canceling orders they called last Monday and said they would be ready by Thursday.
 |
| Friday morning - the center aisle goes up. |
 |
| Just finishing trim. |
 |
| Current horse shed looking at the new barn. |
 |
| Finished structure and roof. |
I decided on a 36x24 barn. The center of the center aisle is 14' or 15' high (with this type of building you specify the leg hights, not the roof hights) and the sides are 9' high, so it is going to be nice and airy. We are going to finish it out so that one side is 2 12x12 stalls with runs that open to our dirt lot. The other side with have a 10x12 tack and feed room, a 10x12 stall, and between them, it will have a 5x12 'hall' that we can use to store hay/ the wheelbarrow/ our muck forks/ everything we use a lot, but do not want in the aisle.
 |
| Since we are finishing it ourselves, our next visit was Lowes. |
We are still debating how we want to finish the outside - all the interior stall walls will be untreated 2x6s, and we had planned to do the same with treated wood on the outside, but there are a few braces that get in the way of that plan. Our current thought is to use the 2x6's up to 5' or 6' high, then use plywood siding up to the roof - since the outside will be painted and that is well above kick height it should not be an issue.
 |
| Cerimonial first board. |
We ordered U - channels that attach to the support legs and you slide the wood into. We started with a small order because they are quite expensive and we wanted to make sure that we liked them before we spent the $$$. Attaching them is kinda a pain because you have to pre-drill out multiple holes, then screw them in, but once they are attached, you just cut and drop the wood in. It took a few hours to screw in the channels and get all the measurements, but then only 30 mins to cut and drop the wood. It was so easy and it looks GREAT!
 |
| I think we need 2 more boards to finish -but this is 3' (our current barn has 3'6" fronts). |
 |
| Could I be more in love! |
It is so light and airy and I know that as we close off the walls it will lose a little bit of that, but with the light wood, the white ceiling, the extra height, and all the windows/ dutch doors - I think this is going to be great!
We are a long way from done - Our current list of projects is to spread and compact more gravel to level out the base in each area, trench and run electric, make exterior walls, make interior walls, make doors, stain, paint, pour concrete, lay rubber mats, lay bricks, fill in the drainage ditch (with appropriate stone), landscape, move everything from the garage to the barn, move horses in, dismantle old shed, spread more gravel in the horse's dirt pen, run new water line, and insulate the roof. All of which costs $$$. So we will be building it out one wall/ project at a time each weekend, but gosh does it bring me joy.


Comments
Post a Comment